Monday, September 29, 2008

Fresh from the Oven

Yum yum these cookies look scrumptious! I whipped up a batch this weekend to give my little baker for Christmas, but they turned out so cute, I'm not sure I can wait that long to give them to her!

I'm planning on making her a little apron out of the polka dot material and also getting a small rolling pin from the craft store to go with them. 

They were a fast and easy project, and would make the sweetest birthday present for a little girl.  All you need is felt for the cookies and icing, some beads for the sprinkles, coordinating embroidery floss, and some polyfill to put inside them to make them squishy.  

To Make:  

-I used a biscuit cutter as a template to cut out two circles from the cream felt.  

-Then, I cut out the "icing" from the pink and/or brown felt. 

 -Next, I stitched the beads onto the icing and top piece of cookie.  

-To finish them up, I used this tutorial , from fabric designer Anna Maria Horner, on felt stitching to stitch around the edge.  

-Before I stitched the cookie completely closed, I stuffed a small pinch of polyfill in the center to puff them up a bit. 

 Now who is ready for a tea party?  

Friday, September 26, 2008

And the Winner of the Doll Kit is...

Comment #10 posted by The Thompson Family 
who said  "I love Olivia."  

Thanks to everyone who participated!  For those of you who really want to make your own doll, I'll be offering B1G1 sale in the shop sometime next week when my new order of flannel comes in.  I'll announce it here blog before the doll kits go on sale for those who are interested!  


Thursday, September 25, 2008

Fabric Flowers


I've had several people ask me how I make the little flowers for the dolls' hair, so I thought I'd create a simple tutorial for anybody to use.  These fabric flowers are really cute and versatile.  You can add them to ponytail holders, bobby pins, pillows, or tacs to use on a cork board.  They even make cute pins to attach to a purse or handbag.  


You will need the following materials:
- Fabric scraps
- Button*
- Hot glue gun
-Heat N Bond
-Iron

*To cover a button with fabric as pictured with these flowers, please see my tutorial for making button earrings.  Otherwise, you can use any type of button or sequin for the center of your flower.  


Step 1:  Cut 4 circles and one square out of your fabric scraps .  (I usually cut my circles with a 4" diameter and a the square as 6" x 6" but you can make them any size you desire.)


Step 2:  Cut a piece of Heat N Bond to cover 1/2 the size of your square.  Follow the instructions that comes on the package to iron the paper onto your fabric. 


Step 3:  Then fold your fabric over so that the Heat N Bond binds the two sides together and iron again.  (You don't have to use the Heat N Bond if you don't have any.  This step helps to stiffen the fabric to provide support to the back of the flower, but you can omit this step if you would rather use felt for the back piece. )


Step 4:  Form the petals of your flower by folding each of the circles in half twice so that they form little triangles.  (I use pins to hold them in place until I am ready to glue them).  

Step 5:  Hot glue two of your petals together at the tips of each triangle.  Repeat for the other two petals.  Cut a flower shape out of your stiffened fabric.  

Step 6:  Assemble your flower by glueing your petals onto the back piece of the flower.  To finish it off, hot glue your button onto the top of the flower in the center.   

You are finished with your flower! Now you can decide what to make with them!

Tuesday, September 23, 2008

Rosie Posie Doll Kit Giveaway


Ok! One last giveaway this week!  I'm starting to run out of things to give so I better start pacing myself.  However, to celebrate my 100th HEART on Etsy, I'll be giving away one of my doll kits!

All you have to do is visit my shop and come back here to let me know which doll is your FAVORITE!  The winner will receive the PDF Doll Pattern and the Doll Kit to make the doll she choose as her favorite. 


 ***And don't be discouraged if you are a beginner sewer or have never sewn before at all.  I tried to write the pattern to make is as easy as possible to follow so even if this is your first sewing project, what a fun way to start! :) ***

Just leave a comment letting me know which doll you like the best, along with an e-mail address and I'll announce the winner on Friday!  

Close Enough?


I'm trying to recreate a room I saw in last month's issue of  my sister's Real Simple Magazine.  They had used a chair from Pottery Barn, which of course is NOT in my budget.  I can't seem to find any green and white fabric similar to the fabric on the chair, so what do you think? Is this close enough to work? I'm thinking most definitely yes(and no, I'm not going to be recovering a chair... at least not yet...)


Monday, September 22, 2008

NieNie Benefit Sale


 For those of you who don't know, Stephanie and Christian Nielson (parents of 4 children under the age of 5!) were in a tragic plane accident a month ago and were severely injured with third degree burns covering most of their bodies.  Their children have been living with extended family while they are in chemically induced comas, facing months and months of treatment.  

If you haven't been introduced to Stephanie yet, she is the author of the fabulously popular blog, the Nie Nie Dialogues, in which she graciously welcomes people into her quaint little home in Arizona, writing about her love for her family and creatively enjoying life to the fullest.     

If you haven't checked out her blog yet, I encourage you to do so.  Then check out the Benefit Sale to support the Nielsons!  Many many many esty artists have donated some of their work and 100% of the proceeds go directly to the Nielson Recovery Fund.  You may even see a Rosie Posie Doll in the mix! ;)  Don't wait too long because the sale only last Tuesday (23rd) & Wednesday (24th)! 


The sale begins at 10:oo PST on Tuesday, September 23rd
Just a small sampling of what will be up for grabs!


Thursday, September 18, 2008

Giveaway Winner for Earring Kit


Hooray for Debbie who left comment #8 "These would make fabulous Christmas gifts. Thanks!"

Thanks to everybody who participated!  The bad news is that everybody can't win, but the GOOD news is that anybody can make the earrings.  The materials are inexpensive and easy to find so hopefully you'll all try to make a pair soon.  :)

Next week I plan on hosting one last giveaway and also posting a really fun tutorial I'll be working on over the weekend! 


Wednesday, September 17, 2008

Blissful Living Studios


I just discovered this delightfully refreshing website several weeks ago and I wish SO BADLY there was something like this available here.  Too bad they are all the way out in Arizona.   You can do everything from yoga classes, to sewing an apron, to scrapbooking, to hosting a baby shower!   

What could be more fun that a bunch of ladies sitting around socializing while working on some fabulous new craft?  It reminds me of the stories my grandmother shares with us about the "quilting circles" when women use to gather together to sew and share stories with one another.   

This excerpt taken from their site pretty much sums up the purpose of their studio: 

"What is Blissful Living about? Having peace and happiness in the home. Being Creative, feeling empowered & organized- having it "together" and living with purpose. Being the best for our families and ourselves. This Lifestyle Workshop/ Studio was developed with this in mind... It is about creating- sharing- developing talents and making the most of each day. Blissful Living is designed to enrich the lives of families through classes, special events & workshops to help you develop talents & make memories for years to come."

WOW.  What a great concept and fun job to have!   (Katie, maybe one day when our children are grown and if we ever live in the same town again, we could start something like this together.   Her store,  Domestic Bliss, reminds me of the type of shop you said you always wanted to have.)
 
For now, since I can't travel to Mesa, AZ for one of their parties or classes, I'll just have to settle for visiting them online for a quick fix of inspiration.   To see more, you can visit them online HERE.  I highly recommend it. ;)

Tuesday, September 16, 2008

Brown Paper Packages Tied Up with String


Fabric is definitely one of my favorite things! Most children love going to the toy store when they are little, but me, I loved taking a trip with my mom to the fabric store.  

Oh the possibilities!! 
 
Imagine my delight to find this package waiting on me yesterday in the mailbox.   I immediately tore into the envelope and began to "oooh" and "aaahhhh".  It is fabric I ordered online to start on my Christmas presents this year and it is even more beautiful in person than in the pictures.  I don't want to spoil the surpise and say what will be made out of this lovely fabric, but I can't wait to get started!   
 For those who are interested, it is from Heather Bailey's new Pop Garden collection.

Monday, September 15, 2008

Vintage Button Earring Kit Giveaway


This week I'm giving away a kit to make your own Vintage Button Earrings (see tutorial in previous post).  

Keep them in mind for the holidays because they make ADORABLE Christmas gifts for girlfriends or co-workers. :) 

The winner will receive all of the materials needed to make 3 pairs of earrings, including a bag of fabric scraps, button, and earring backs.  

Just leave a comment below and I'll draw a name on Thursday and announce the winner!  

Vintage Inspired Button Earrings


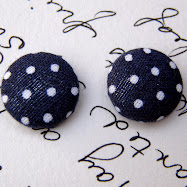
Aren't these earrings just darling!  Reminiscent of the earrings worn during  30's & 40's, they are so much fun to wear and make really unique gifts.


To make them you will need the following:

* Buttons to Cover Kit (found at any craft or fabric store...I buy them at Hobby Lobby and Hancock Fabrics)
* Fabric scraps (I've found that smaller designs work best)
* Earring backs (also found at any craft store)
* Hot Glue Gun


This is what the refill package of button covers looks like.  The first time you make them, you will need to purchase the kit which also includes a holder and pusher - (see below).
 

Step 1: Using small pliers, remove the loop on the back piece of the button. 

Step 2:  Using the template provided on the back of the button package, trace and cut out 2 circles from your fabric. 

Step 3: To make an earring, place your fabric circle (wrong side facing up) into the white holder.  Then place your round button into the circle.  Push the button down using the blue plastic pusher.  

Step 4: Make sure your fabric completely wraps around and covers the sides of your button.  Push the back piece into the holder, locking the fabric into the button. 

Step 5:  Now just pop out the covered button and hot glue the earring back into place.  Repeat for the second earring.  


Friday, September 12, 2008

And the Winner Is...


Congratulations to Lillian for winning the doll giveaway! Thanks to all who participated.  I enjoyed your comments and wish I had enough to send you all a package.  

However, stay tuned because I'll be giving away another fun project next week!  

Easy Art

This is a super easy project that can be completed in less than an hour and looks so cute in a child's playroom or bedroom.  I made this to hang in the playroom several weeks ago after trying to figure out a way to add color and art to the room without spending a dime.  I dug through my fabric scraps and used a pillow I had seen in the Pottery Barn Kids catalog as inspiration.

Materials Needed:
 * Frame (I just used an old one we had in storage that I had picked up at a yard sale and painted it white).

* A piece of fabric slightly larger than your frame to use as the background

* Various fabric scraps

* An idea of the picture you are going to create (you can use pages from a coloring book as a pattern, or anything you find that inspires you!)

* Heat N Bond No Sew (This is an inexpensive iron-on adhesive that you can find in the craft section at Wal-Mart or any crafting/sewing store.)

Have fun cutting out your fabric to make the picture you desire and then follow the directions on the back of the Heat N Bond package to iron the fabric pieces onto your background.  Pop the picture into your frame, hang it on the wall, and ta da!  You are all done!  That was easy! ;)


Wednesday, September 10, 2008

"A" is for Anna


I'm working on redoing Anna Cate's bedroom now that she is about to graduate to a big girl bed.  Because we waited to find out if she was a boy or a girl, I had to be gender neutral when decorating her nursery.  Now I get to have fun and play with pinks, greens, and all things girly!  

Michael's was having a huge sale last weekend and the letters I have been eyeing for awhile now where priced at $1.99 each.   I have seen people paint the letters before with stripes or polkadots and thought they would be cute either hung or her wall or sitting on her bookshelf. 

I ended up just using scrapbooking paper I already had at the house.  After tracing the letters onto the paper, I just cut them out and glued them onto the front of the letters.  It turned out to be a super fast and easy project and they turned out so cute!  


Tuesday, September 9, 2008

Wooden Girl Set Giveaway

One of my goals with this blog is to inspire others to create!  So to celebrate this new little endeavor and get everybody in the spirit of crafting, I'm going to be giving away a set of these adorable little wooden girls for you to paint yourself.  What a FABULOUS gift idea for the little girls on your list or to give as birthday party favors!


 I first found these adorable dolls on Etsy.  If you are interested in purchasing some already painted, you can visit  TooCute, or check out Gemmielou to purchase the unfinished version to paint yourself (you should also be able to find them at any craft store.)   I'm working on a set for one of Anna Cate's Christmas presents this year and they are darling, if I must say so myself. I would have loved these as I child, as I have always had a fascination with playing with little miniature toys.  

I'll be giving away a set of four girls (unfinished).  Just leave a comment below and I'll draw a name on Friday and announce the winner!  

Hello!

Hi and welcome to my new blog!  I plan to use this site to organize and share all of my creative ideas and projects I'm working on, host giveaways to inspire other to get creative, and showcase handmade goodies that I find from other crafty chicks.  Stay tuned...this is going to be FUN!